How I Make Analog Repeat Patterns with Paper Collage | What's On My Palette: Mar 15–21

Last week’s studio time started the way a lot of good things do for me lately… with a spark I didn’t overthink. ✨
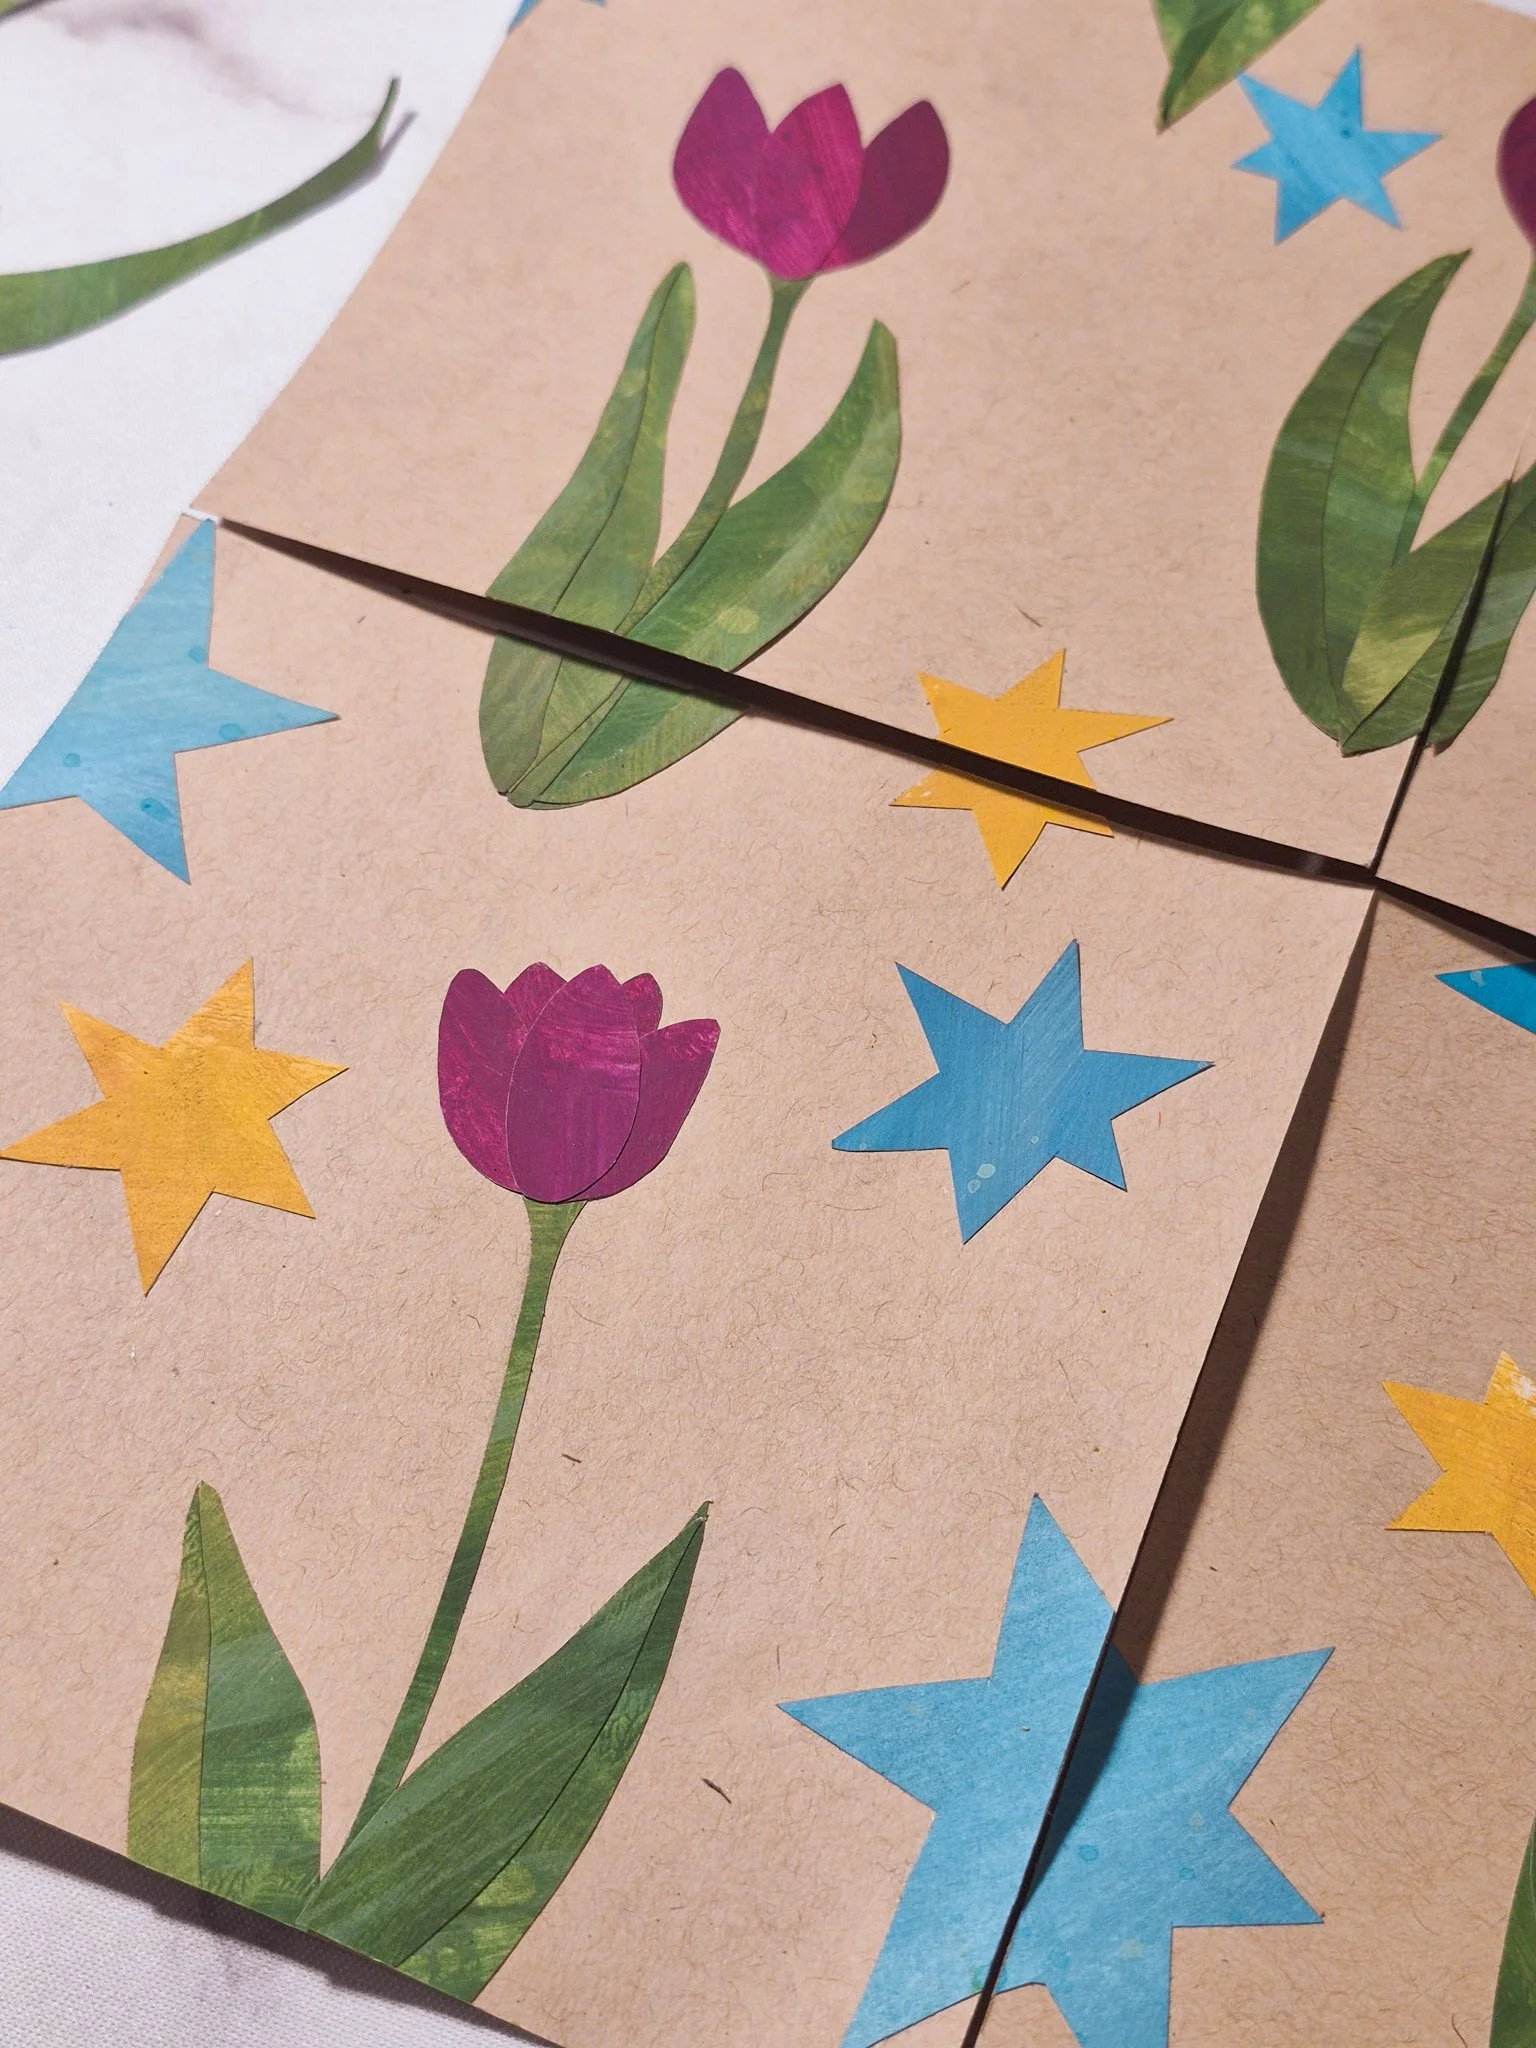
I fell down a bit of a rabbit hole watching repeat pattern videos (as you do), and before I could talk myself out of it, I decided to just try it. I wanted to see if it was doable with paper collage since every one I’d seen was hand-drawn or painted.
I had no plan, no prep, just pulling from my (dwindling) painted paper stash and seeing what happened.
And if I’m honest… I don’t really love how it turned out. 😅
The colors feel a little off to me, and the composition isn’t quite clicking in the way I wanted it to. It’s one of those pieces where I can see what I was going for, but didn’t quite land there.
However, I REALLY LOVED making it!
Like, fully lost track of time, scraps everywhere, brain lit up in the best way… loved it!
And that feels worth paying attention to…

🎨What’s On My Palette is a studio series where I share the process, art supplies, creative workflow, and behind-the-scenes of my current illustration projects. Perfect for artists, stationery lovers, and creative entrepreneurs curious about process and materials.
If you want to see more, check it out here: What’s On My Palette
7 Steps to Illustrating an Analog Repeat Pattern
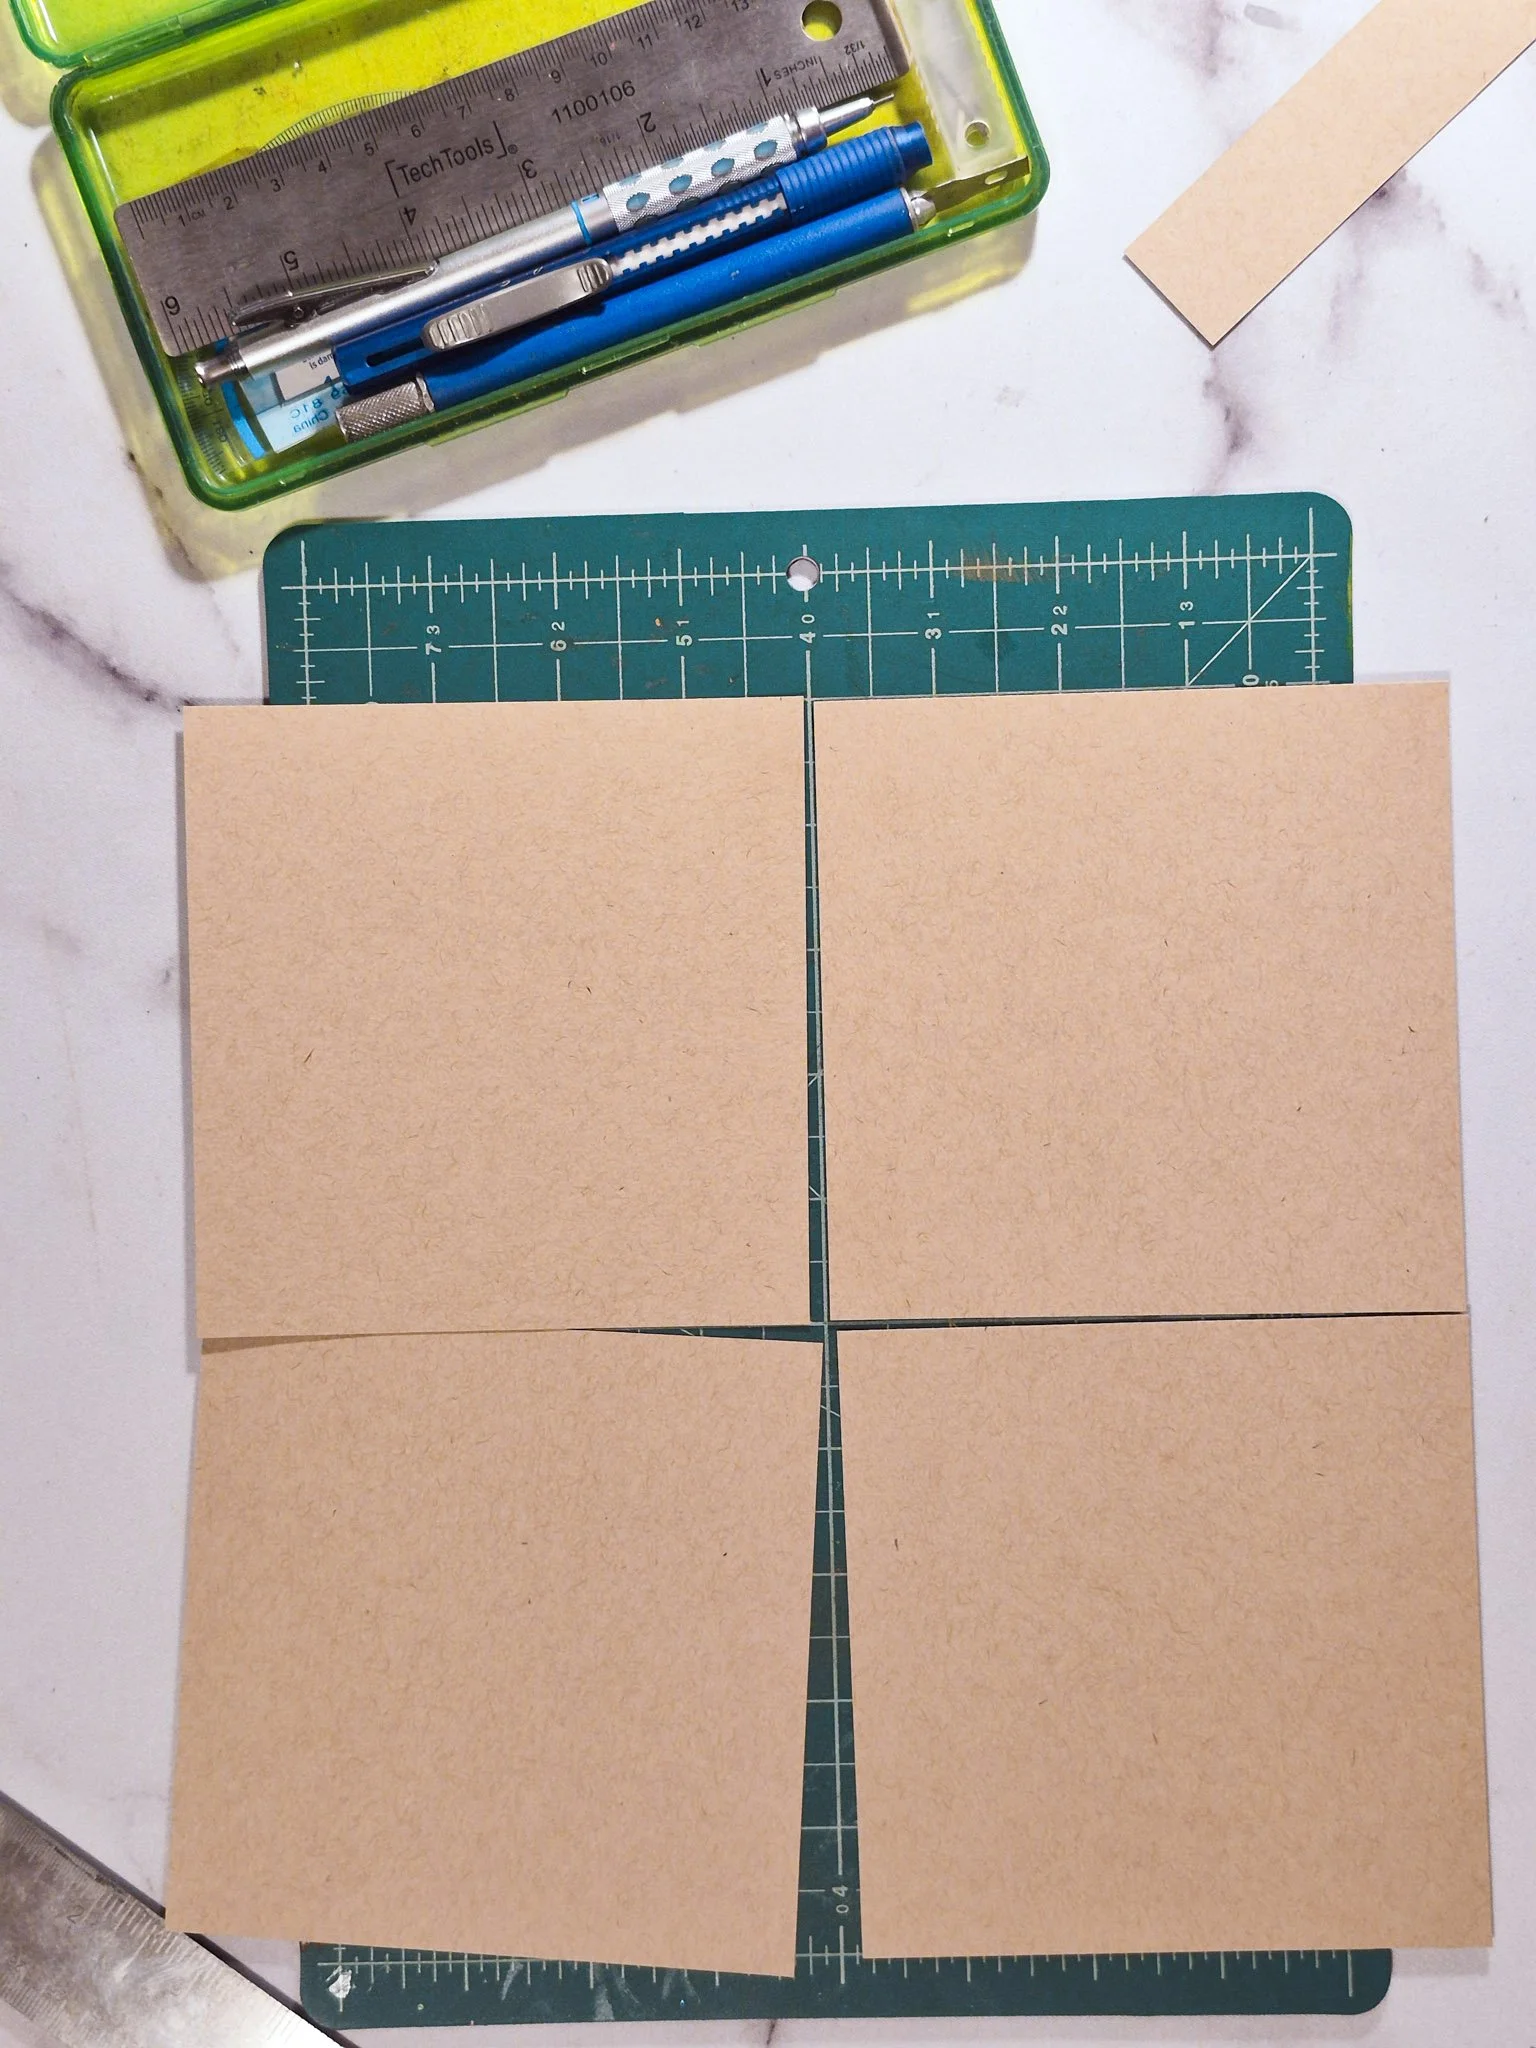
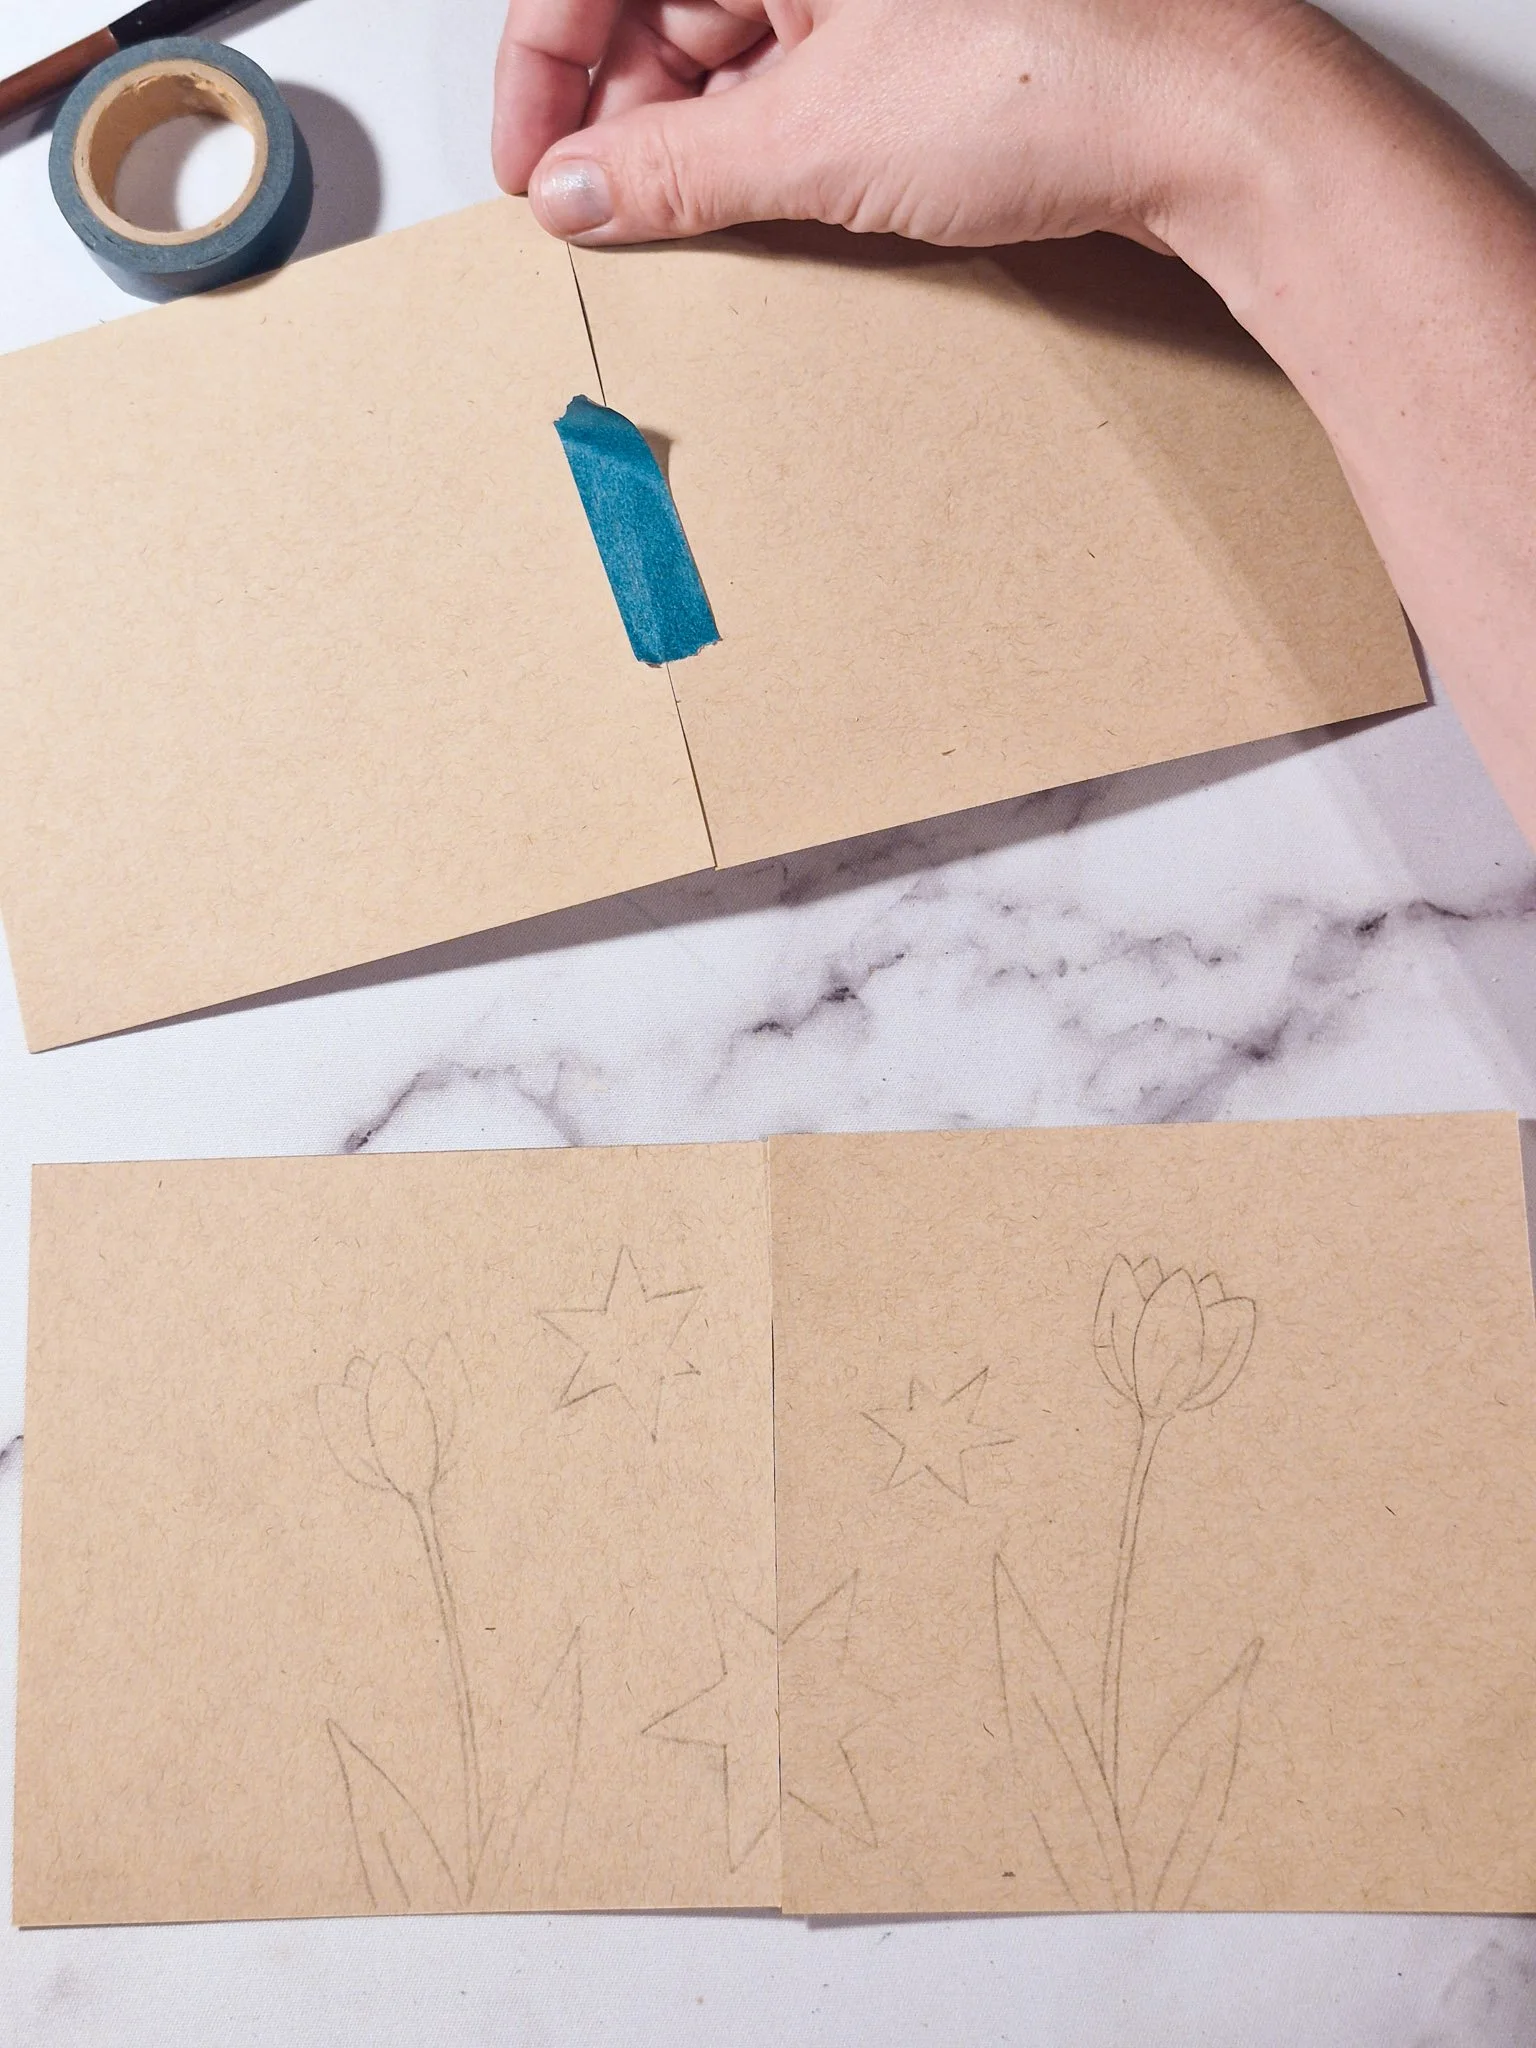
1. Start with 4 equal square pieces of paper
Same size, same orientation.
Lay them together in a square shape.
Lay them out like this:
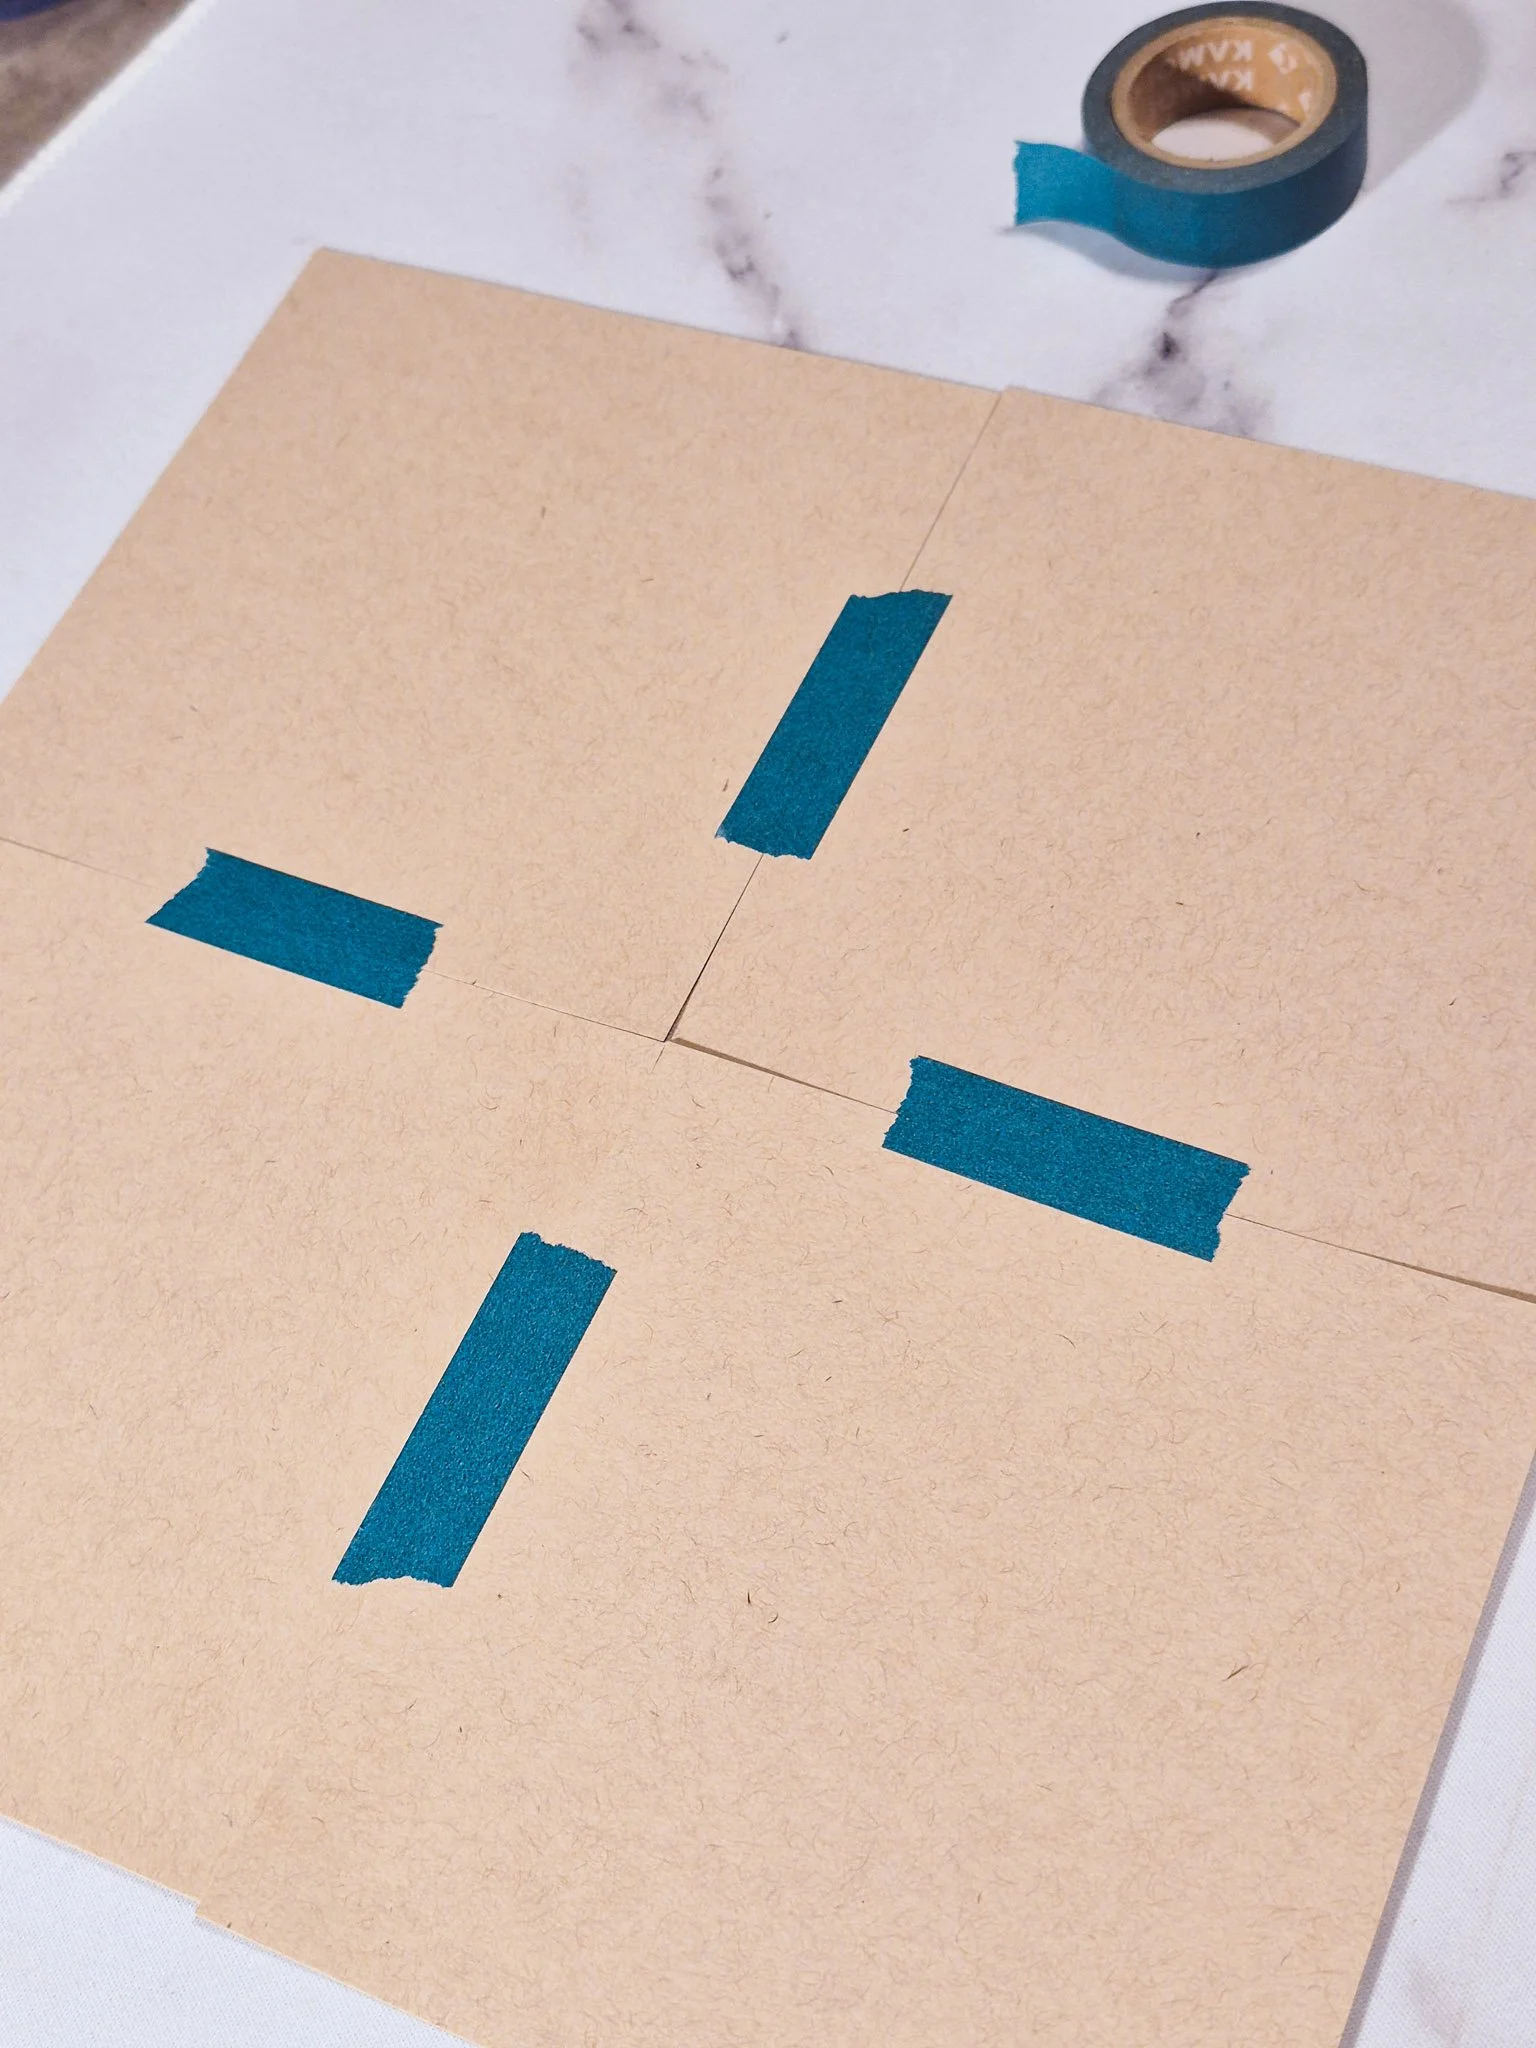
2. Tape them together (lightly)
Tape on the back side.
Just enough to hold while you work.
You’ll be removing them later.
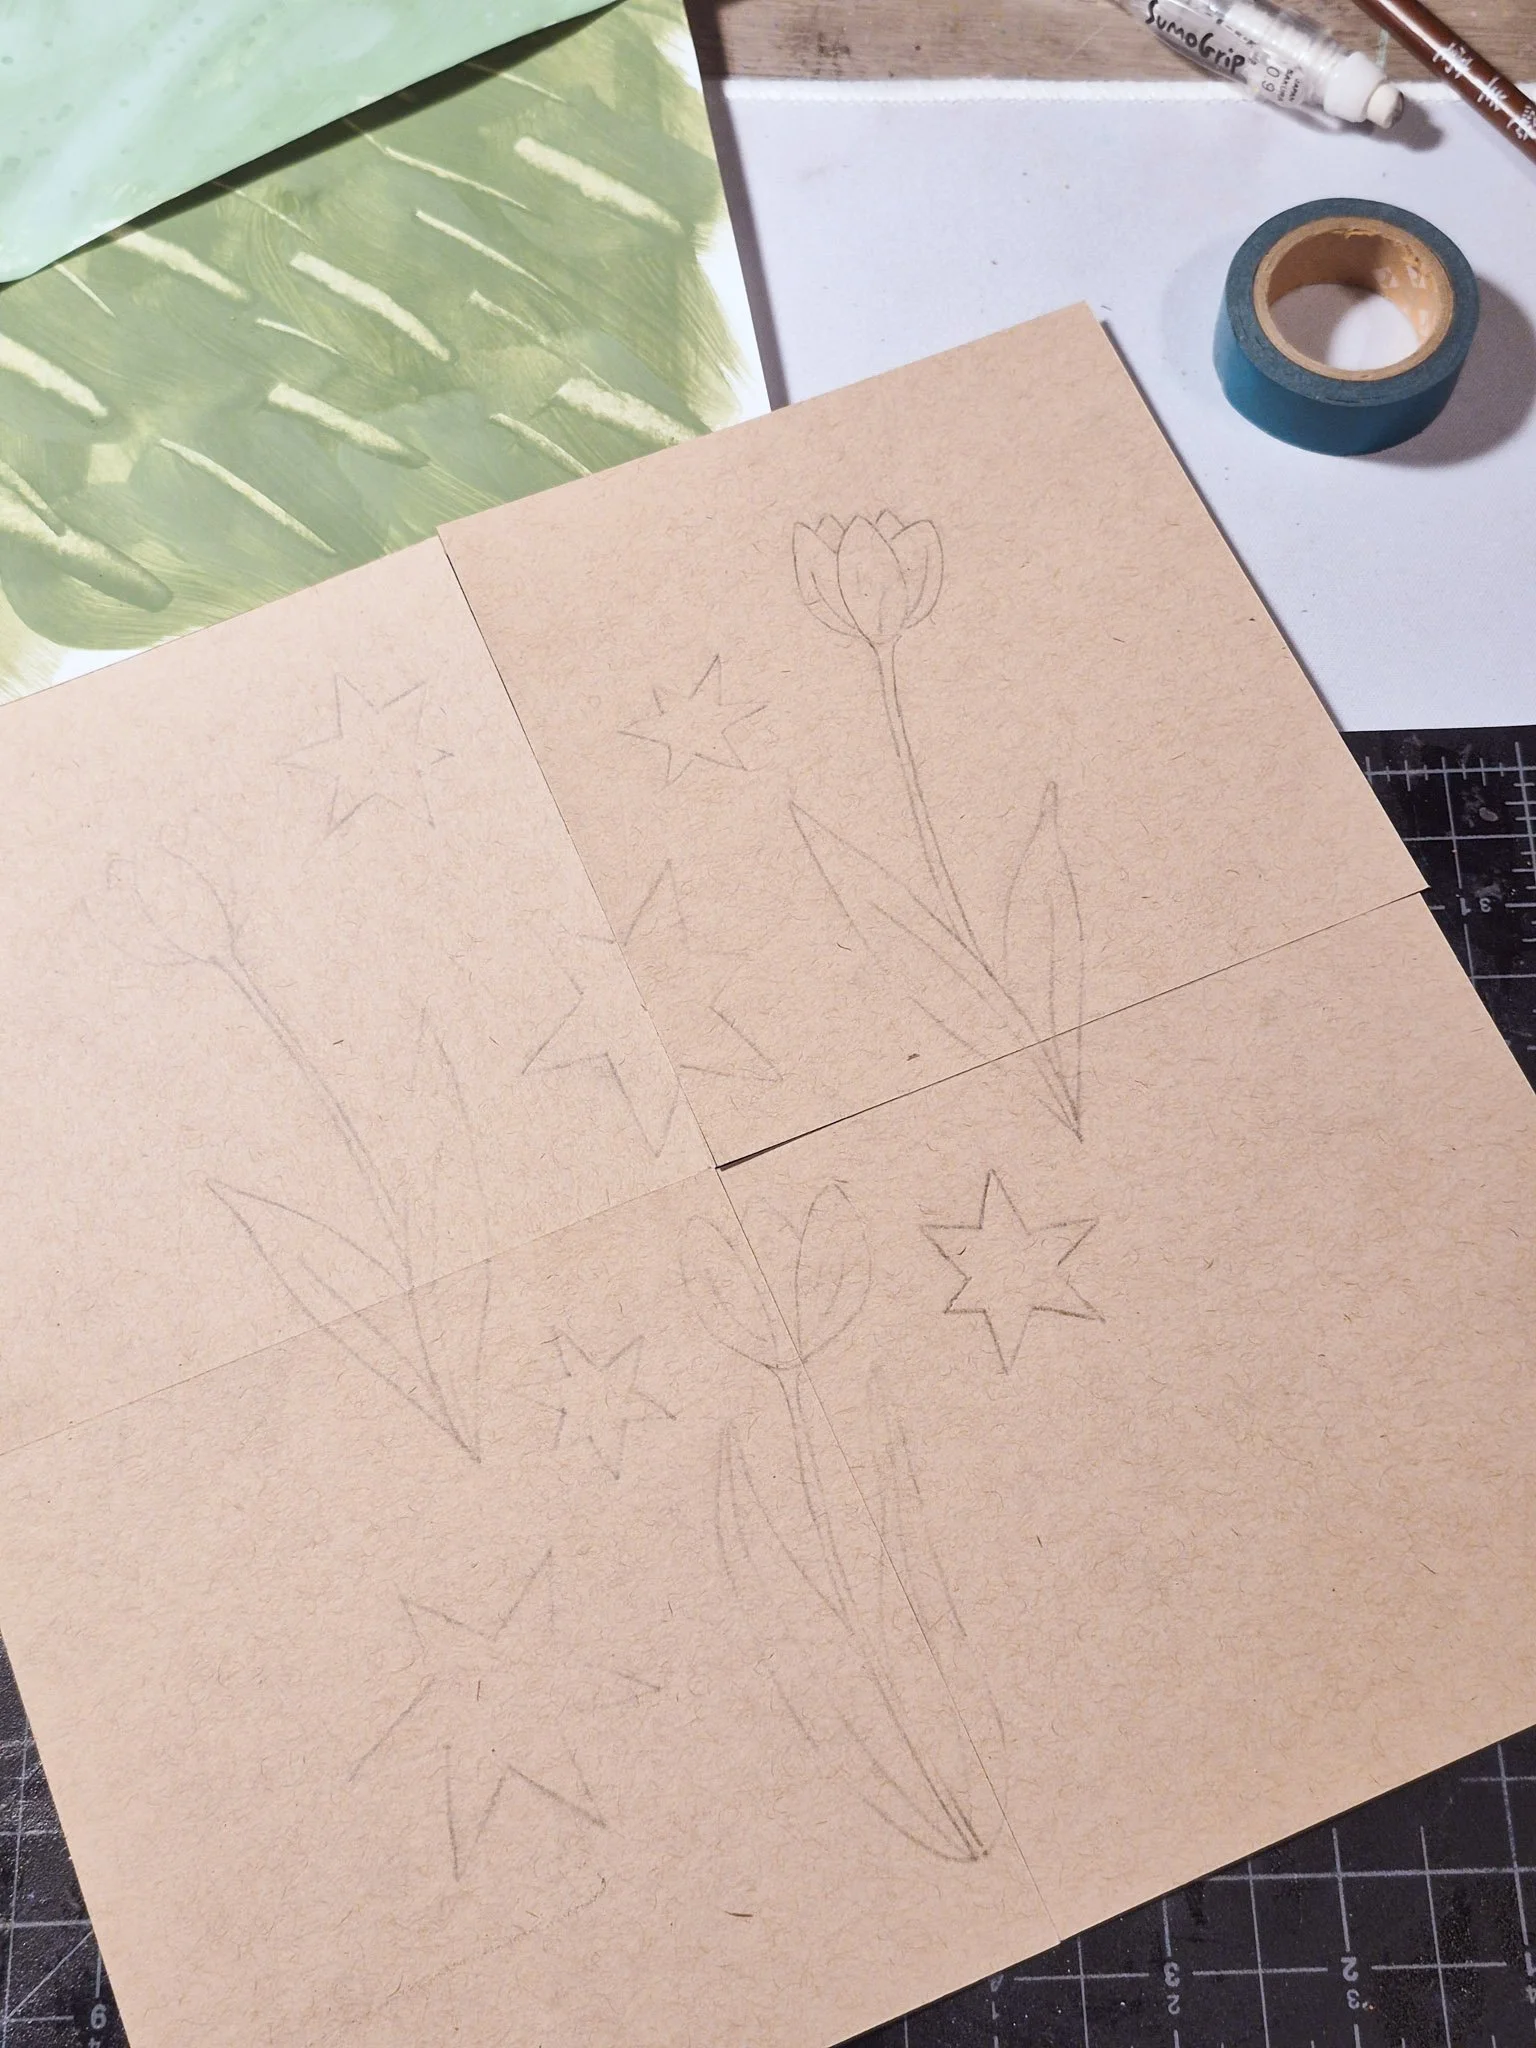
3. Draw your designs in the middle area
Treat it like one canvas.
Let elements cross between pieces.
Don’t draw near the edges yet.
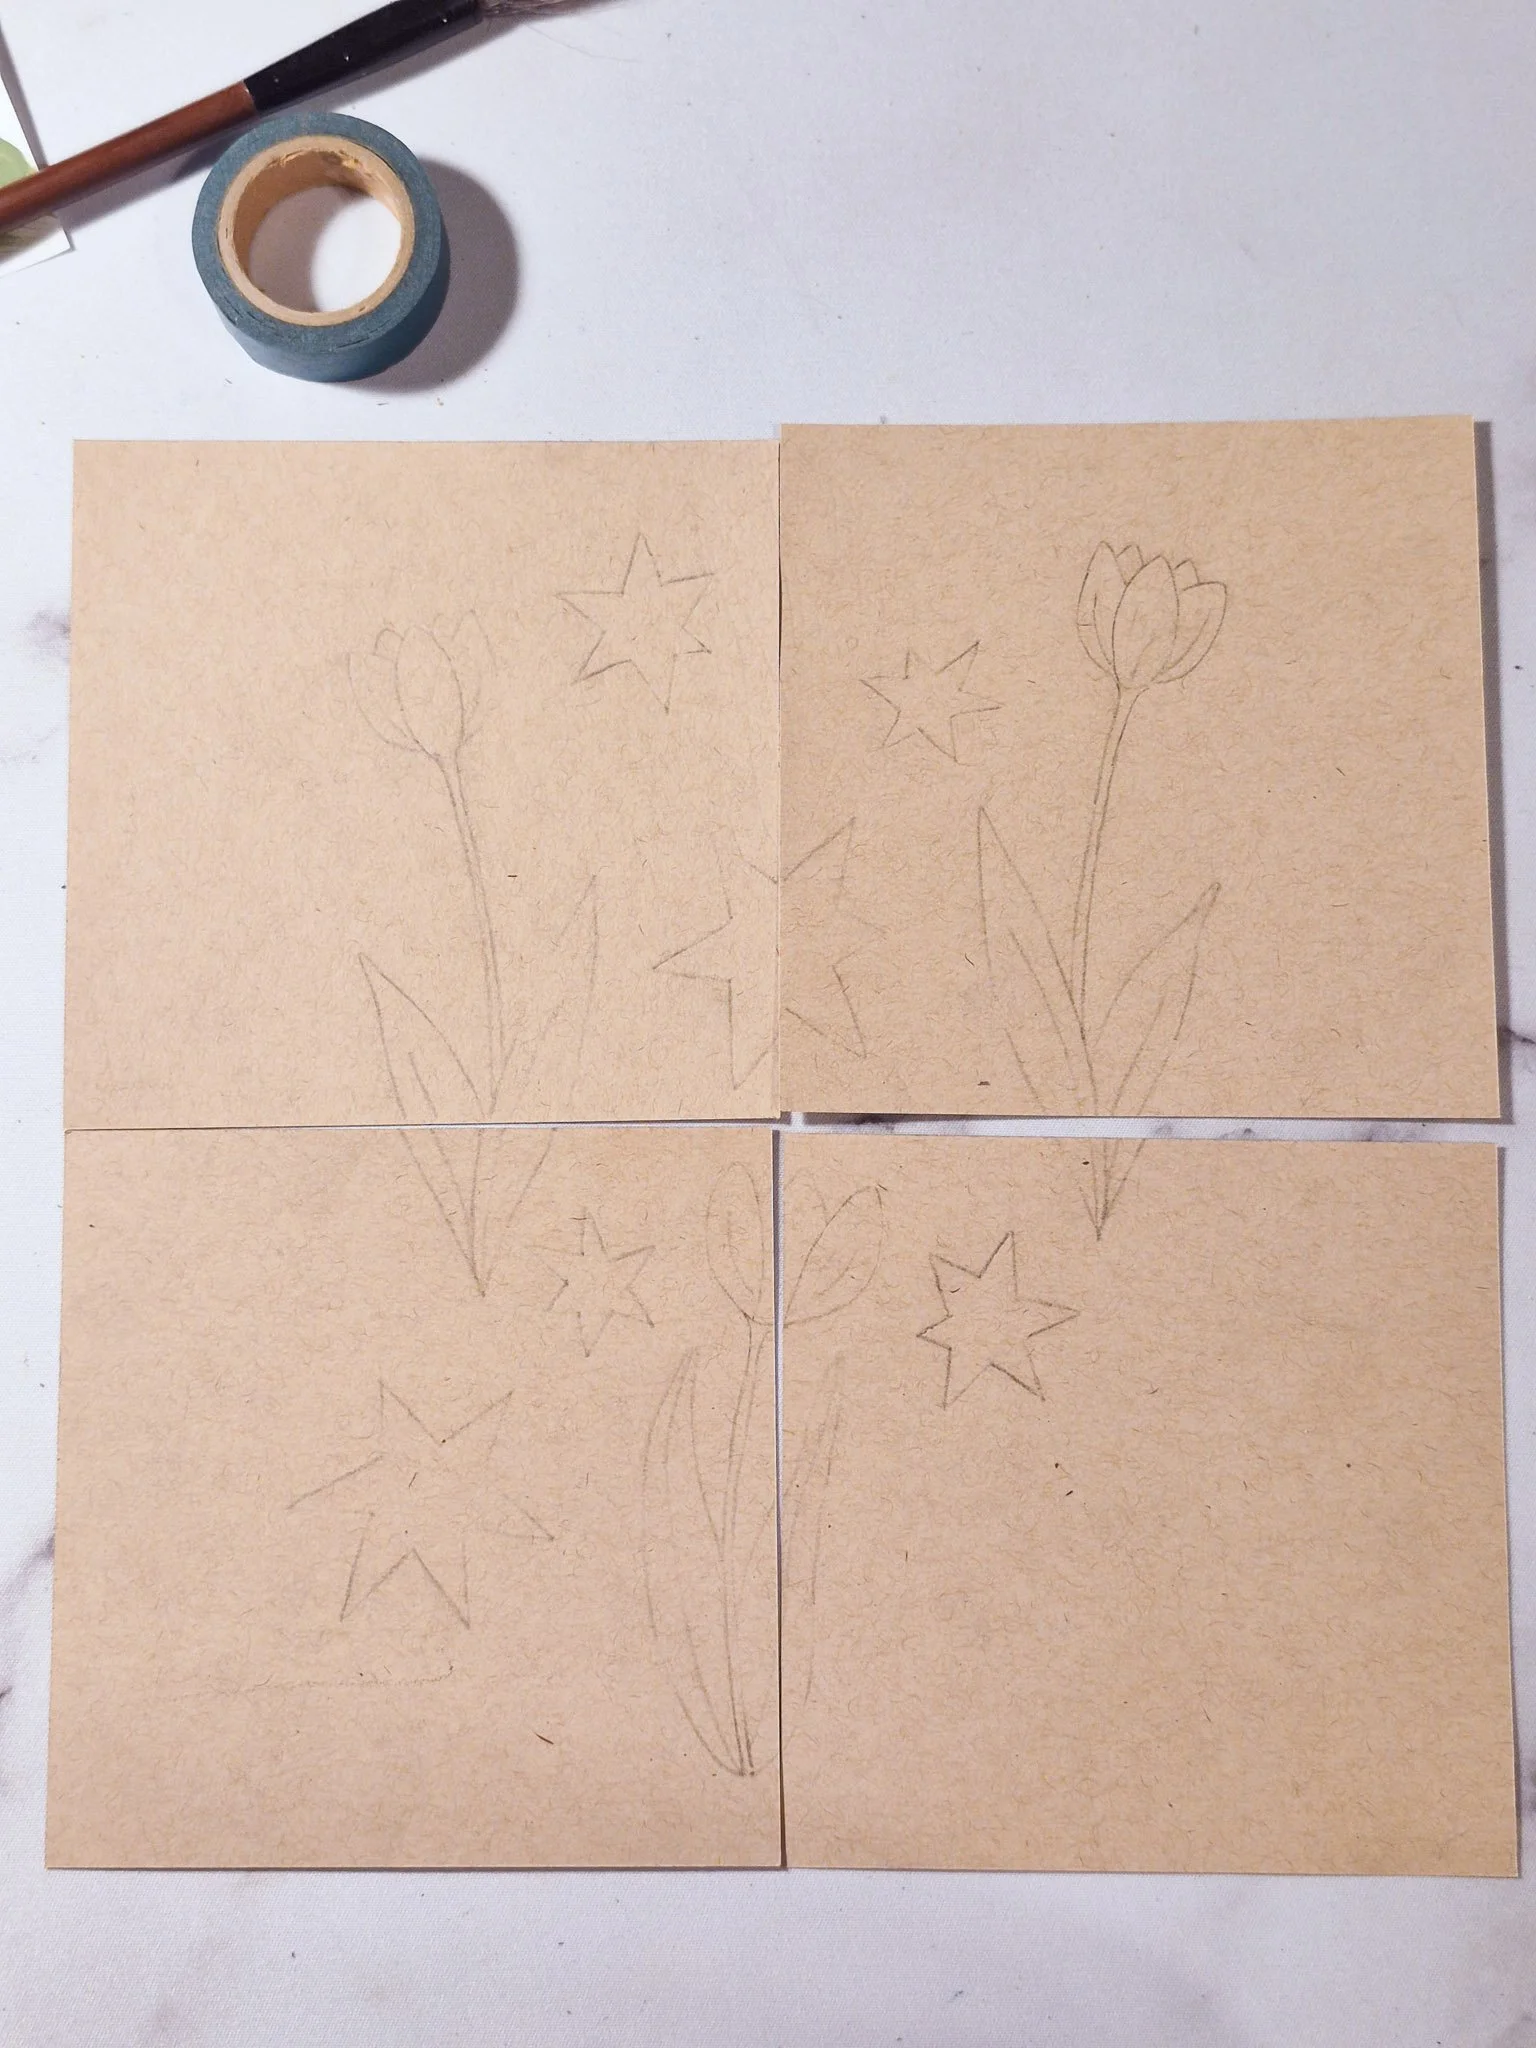
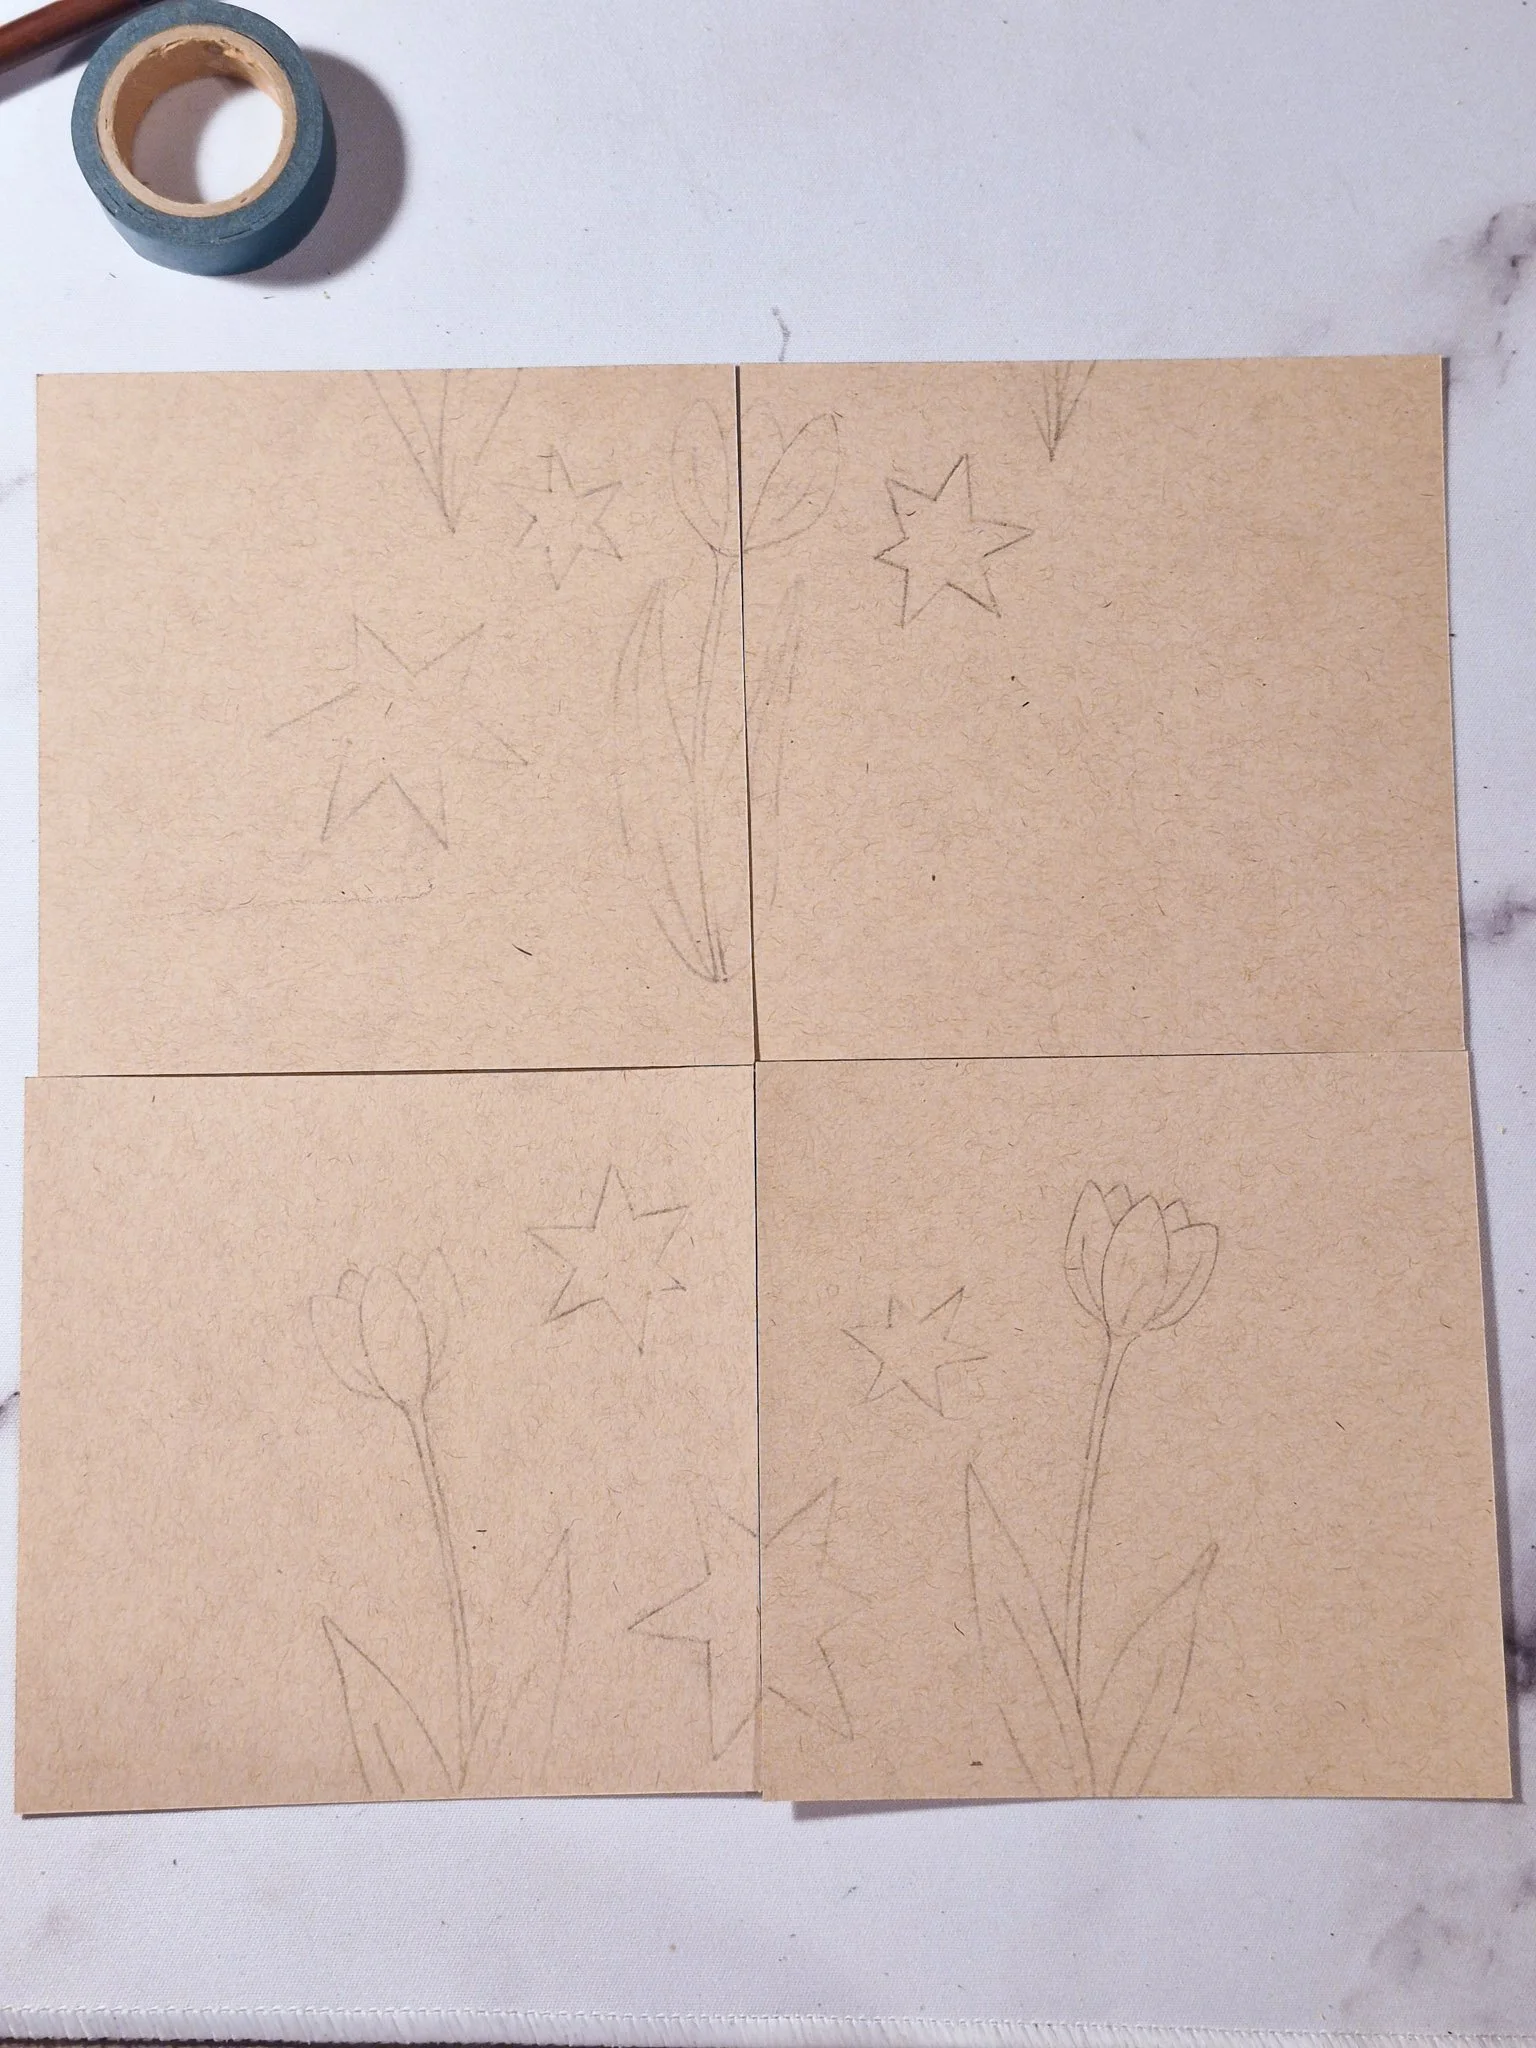
4. Separate and swap TOP ↔ BOTTOM
Now remove the tape.
Swap the two squares on the top with the two on the bottom.
Tape back together.
5. Flip over and fill the space
Now draw in the new empty space.
Allowing images to cross the seams. Still avoiding the edges.
This step makes the top/bottom edges repeat seamlessly.
6. Separate and swap LEFT ↔ RIGHT
Remove the tape again.
Swap the two squares on the left with the two on the right.
Tape back together.
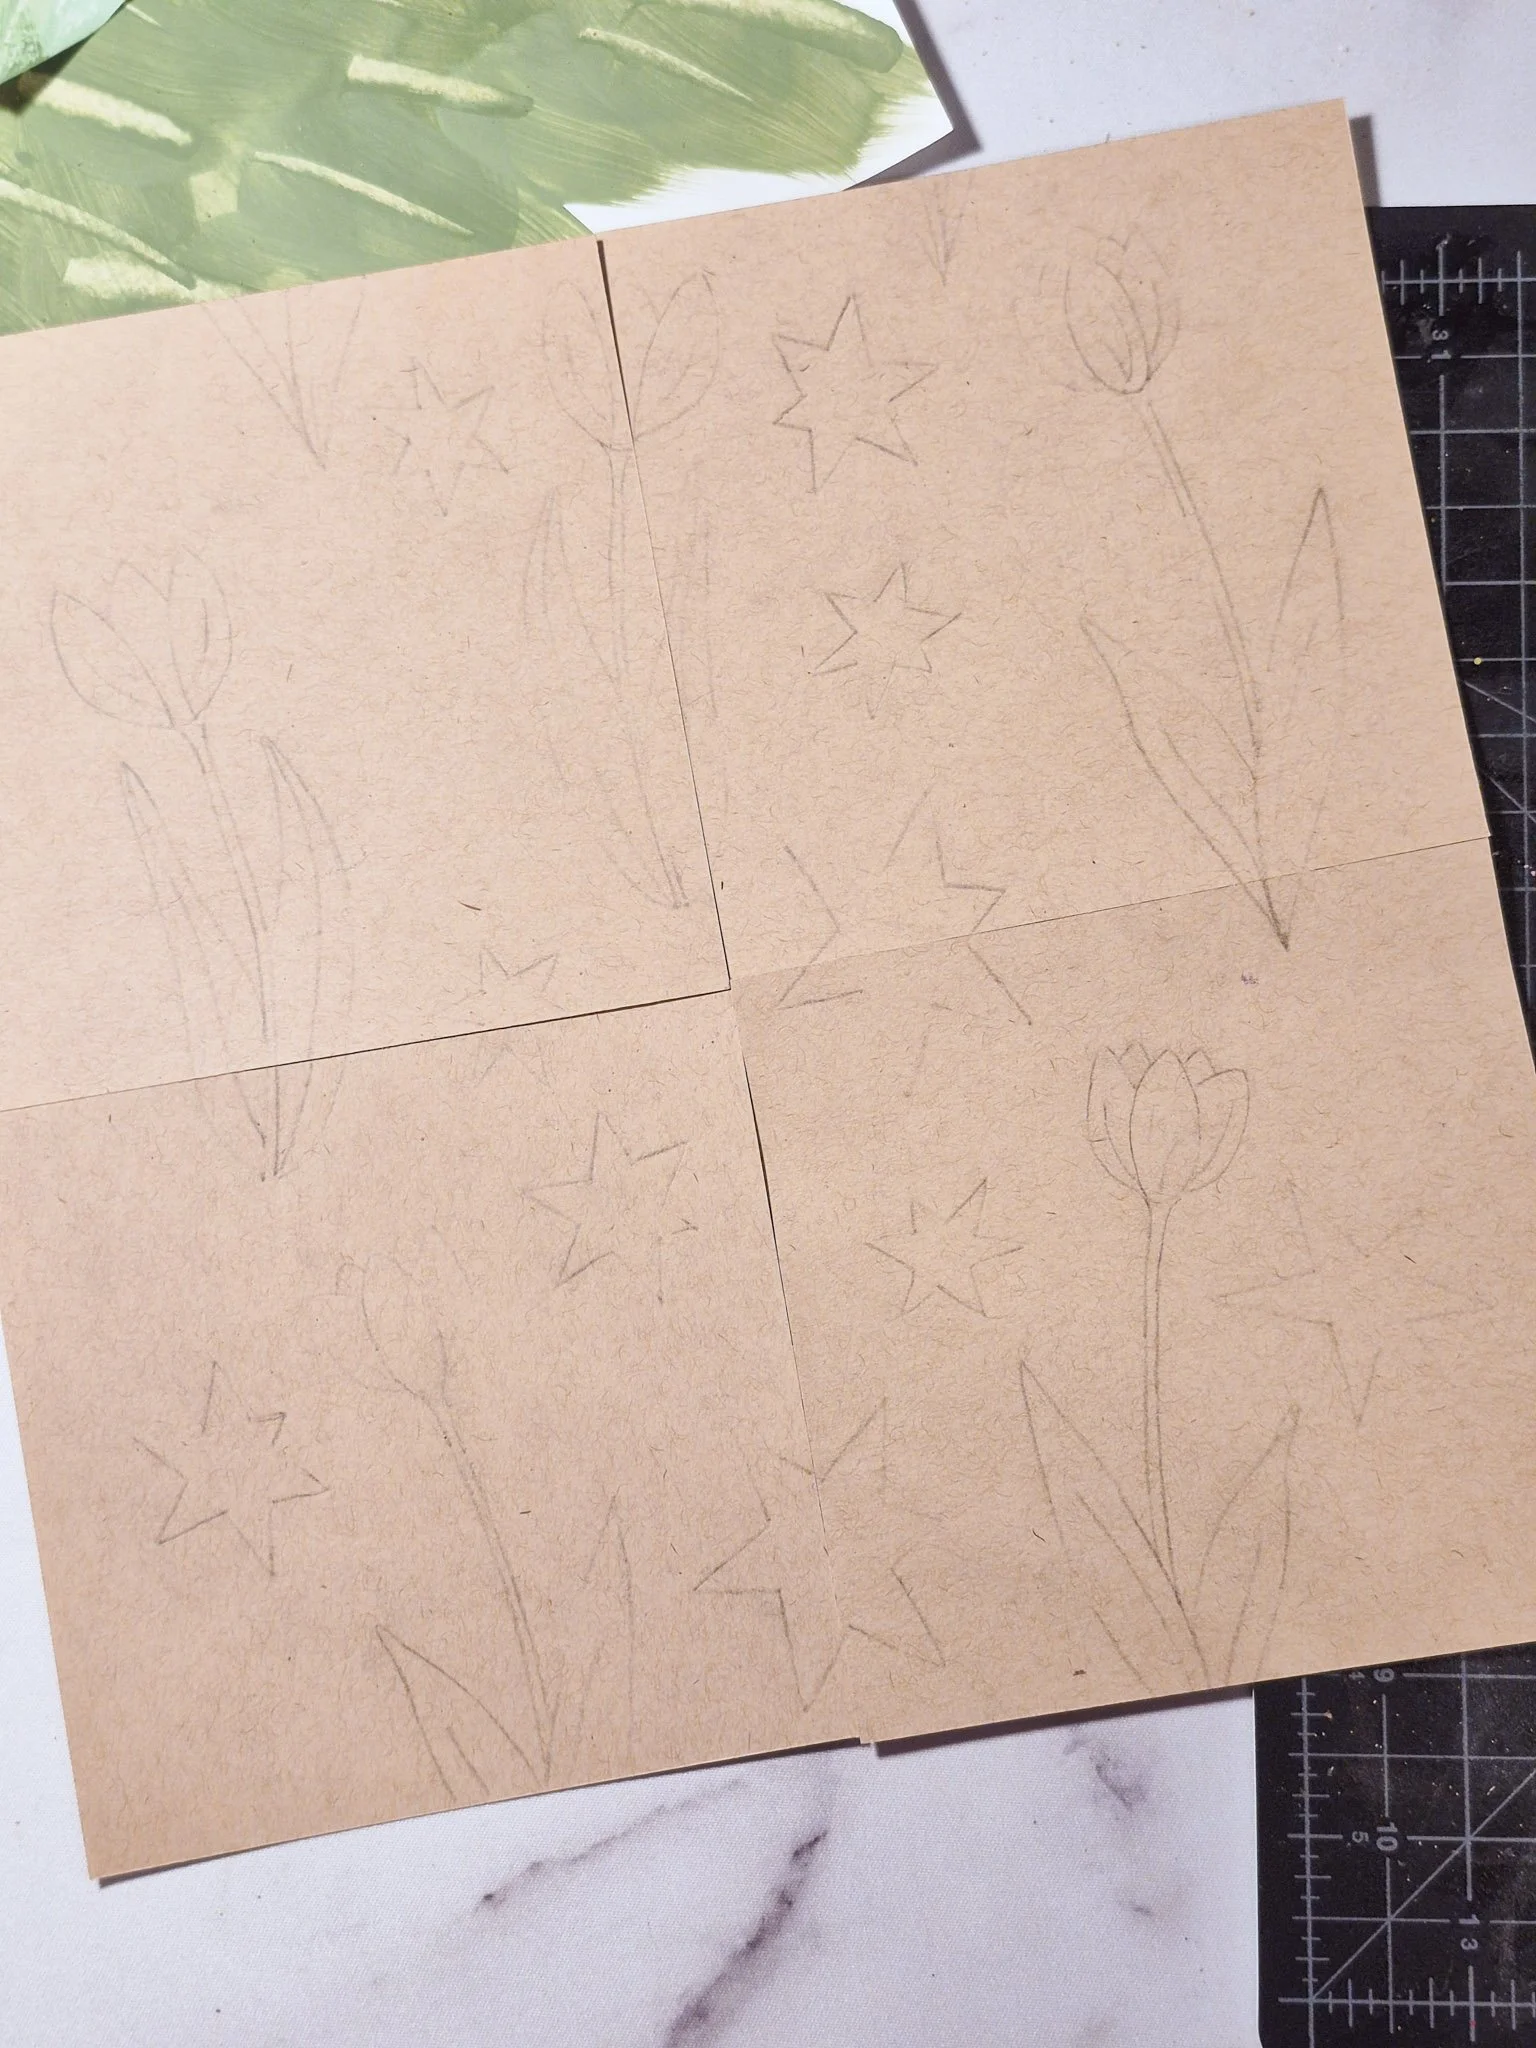
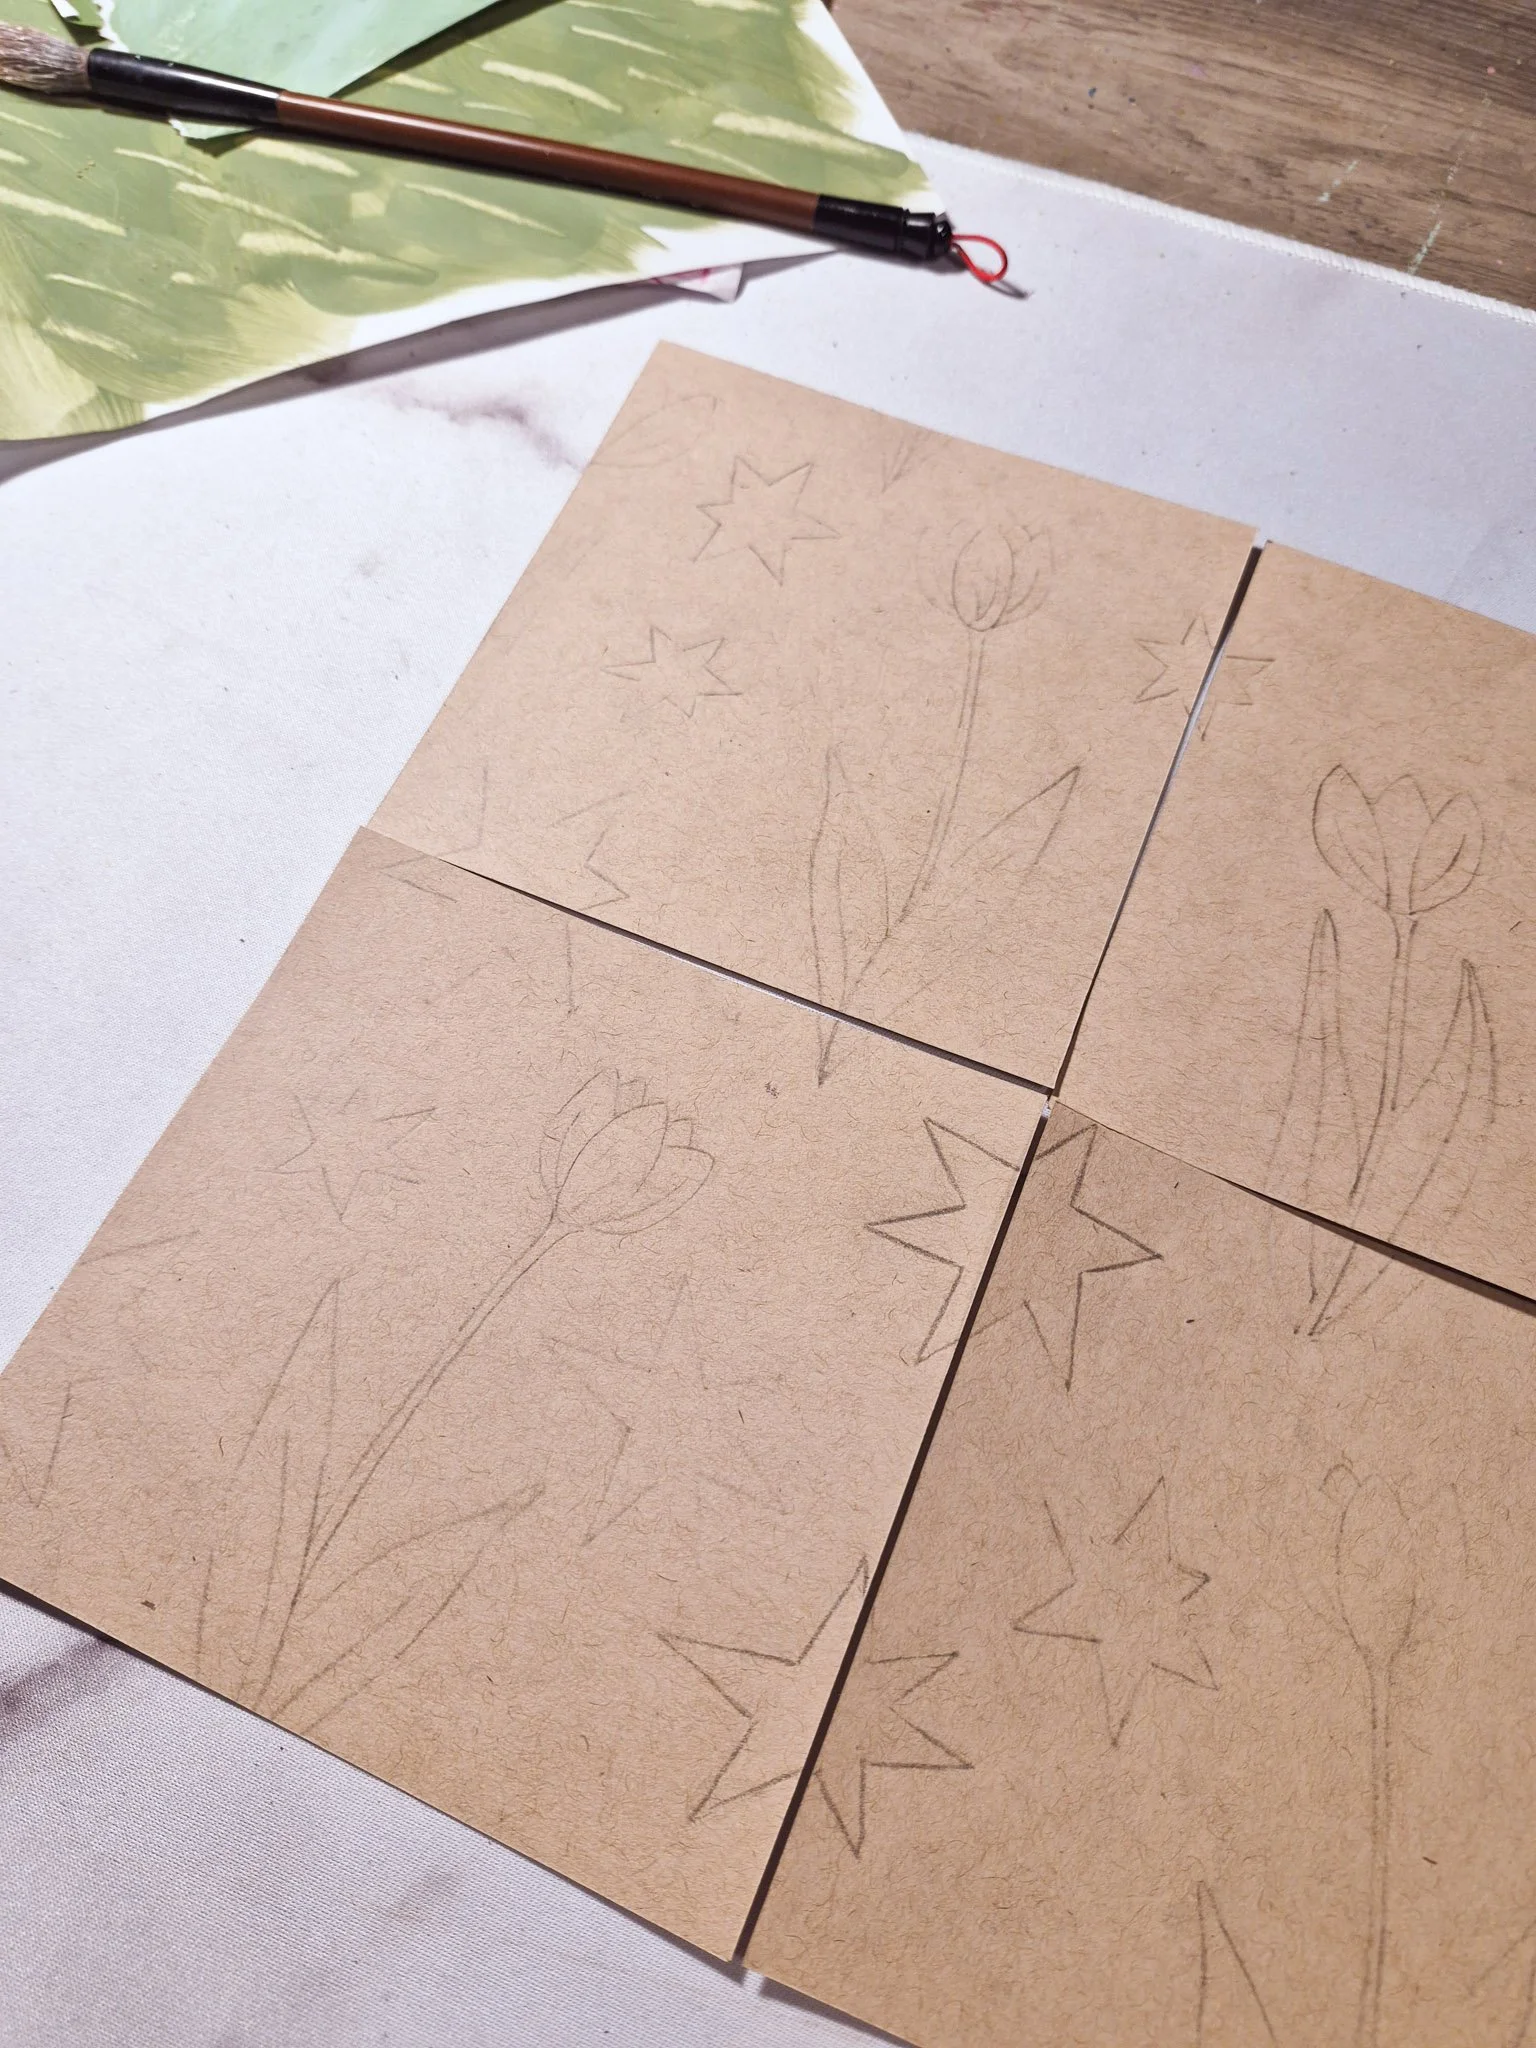
7. Flip over and fill the space
Draw in the remaining empty space.
Finish with final details, avoiding the edges.
Ways to Use Your Pattern:
Once it’s finished, you can turn your design into:
gift wrap
book covers
thank you cards
stationery
phone or desktop backgrounds
Don’t forget to scan or photograph your pattern tile so you can assemble and repeat it digitally in Adobe Photoshop or Adobe Illustrator!
In this post, we’re focusing on the repeat pattern structure itself.
Next week, I’ll show you how I use this same method to create a paper collage repeat pattern, including how I turn my sketches into templates for cutting and layering.
Thanks for reading! See you next week!
Xo,
Sarah
🎨What’s On My Palette is a studio series where I share the art supplies, creative workflow, and behind-the-scenes of my current illustration projects. Perfect for artists, stationery lovers, and creative entrepreneurs curious about process and materials.
If you want to see more, check it out here: What’s On My Palette